Showing posts with label Violin left angle. Show all posts

Wednesday, August 28, 2013

WEDNESDAY, AUGUST 28, 2013

QUOTE:
“Do not take up music unless you would rather die than not do so.”
AUTHOR: Nadia Boulanger
MEANING OF THE QUOTE:
“A true musician must be willing to give up everything for his art"


COMPOSER
CHOPIN


Prelude Op.28 No.15
"Raindrop"
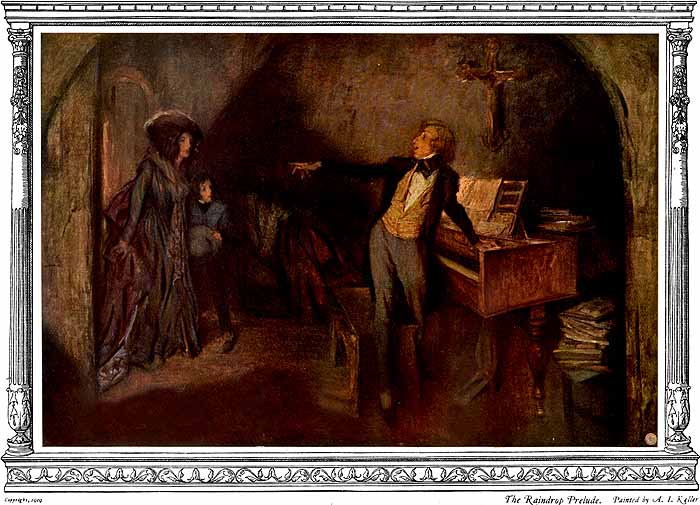
A I Keller, "Chopin, The Raindrop Prelude" (1919)
Steinway
Played by Horowitz


GRANADA ADV. STRINGS
1.  Pachelbel/Jolly
2.  Jingle Bell Rock

INTRO. TO INSTRUMENT
1.  Hillview:
ALLEY CAT PERCUSSION ORCHESTRATION and PERFORMANCE
a.  REVIEW INSTRUMENT NAMES
1)  GO OVER  and REVIEW (AS NEEDED) HOW TO ORCHESTRATE PERCUSSION INSTRUMENTS
2)  ASSIGN COLORS ON THE CHARTS TO DIFFERENT INSTRUMENTS
3)  STUDENTS COUNT OUT LOUD and PLAY THE INSTRUMENTS ASSIGNED THAT MATCH THE COLORS
.4)  STUDENTS PERFORM TO THE RECORDING
5)  AFTER COMPLETION STUDENTS SWITCH INSTRUMENTS TO TRY ANOTHER
2.  Granada:
a.  Keyboard Procedures
b.  Locating musical alphabet notes on the keyboard starting with "D"
c.  Finding notes B-A-G to play "mary" on the keyboard

GRANADA BEG. STRINGS
1.  Shoulder rest and left violin hold and proper violin angle
a. PLACEMENT OF SHOULDER REST ON THE VIOLIN FOR COMFORT
b. EXPLANATION ON WHY THE BOW IS NOT TAUGHT UNTIL AFTER THE LEFT 
c. VIOLIN HOLD TECHNIQUE IS MASTERED
d. HOW IMPROPER LEFT VIOLIN HOLDS EFFECT THE BOW
e. VIOLIN ANGLE TO BE DETERMINED FOR EACH PLAYER 
AS TO PLACEMENT OF THE ARM UNDER THE VIOLIN
2.  Left pizzicato introduction


ESTABLISHING THE PROPER VIOLIN LEFT ANGLE THROUGH  LEFT HAND PIZZICATO

PIZZICATO (OFTEN SHORTENED TO "PIZZ.") 
IS AN ITALIAN TERM MEANING "TO PLUCK" THE STRING


a.  LEFT THUMB PLACED AT THE CURVE OF THE VIOLIN NECK (CALLED THE 5TH POSITION) IN A BACKWARDS "C" POSITION
b.  USING THE PAD OF THE 1ST (LEFT INDEX) FINGER DEPRESS EACH STRING (STARTING WITH "E") 8 TIMES AS IF YOU WERE DEPRESSING A BUTTON OF A DOORBELL THUS CREATING A SPRING WITH THE FINGER ON THE STRING 
c.  REPEAT THE SAME AGAIN USING THE 2ND FINGER, THEN THE 3RD, and LASTLY THE 4TH 
1)  IF THE LEFT ARM, WHICH IS UNDER THE VIOLIN, IS IN PAIN ADJUST THE VIOLIN ANGLE 
2)  IF THE ARM ACHES (THE A MUSCLE IS BUILDING) GIVE THE ARM A   LITTLE REST 
d. REDO THE EXERCISE AGAIN ONLY THIS TIME AFTER DEPRESSING THE STRING EACH TIME, 
TO CREATE THE PIZZICATO PULL THE STRING TO THE RIGHT
(TO THE RIGHT MEANING FROM THE VIOLINIST'S PLAYING POSITION WHILE LOOKING TOWARD THE SCROLL) 
1) BE SURE TO DEPRESS (FEEL) THE STRING BEFORE PULLING IT EACH TIME


HILLVIEW ORCHESTRA
1.  Concert D Major Scale to the rhythm of Jingle Bell Rock we worked on yesterday
a.  Played the entire rhythm on one pitch of the scale then repeated again on the next one, etc.
b. Students worked on phrasing (breathing) and articulation of sound
2.  JINGLE BELL ROCK
a.  Tried to read throught the entire piece without stopping at performance tempo
b.  Reviewed the beginning
3.  SILENT NIGHT
a.  Started to sight read

Wednesday, September 15, 2010

WEDNESDAY; SEPTEMBER 15, 2010

GENERAL MUSIC PERIODS 2, 3, 6:
COMPOSER: Chopin Waltz in Db Major Opus 64 #1 "Minute Waltz" [Not really meant to be played in a minute but it is a very short piece played on the fast side.


Played by: Ignaz Friedman

OBJECTIVE: Intro to Recorder: Making Sounds
(Periods 2,3,6):
1. Quote by J.S. Bach/explanation about how long ago he lived and how musicians of his time made a living (who could afford to pay his salary) and what types of audiences were listening to his music.
2. Solfege Roll: Review solfege hand signals adding "Sol." Teacher asks with hand signals: Sol-Mi-La-Sol-Mi ("Mar-y did you finish your quote?")/Student answers with hand signals: Sol-Mi-La-Sol-Mi ("Yes I did") and show the quote to me.
3. Finish percussion worksheets: Pictures of instruments need to be labelled with their correct names. A few students volunteer to go up to the white board and fill in the names of the instruments on the charts (same as the assignment) so everyone can check their answers. Worksheets to be turned in when finished: worth 2 points.
4. Recorders taken out and teacher gives directions with silent cues (as a conductor would). Students to echo sounds played by the teacher: loud vs soft, slow versus fast, ugly versus pretty sounds, steady versus bumpy type sounds.
5. Recorders left hand and right hand; why are the right hand fingers placed on the bottom of the instrument?
TOMORROW: DISCUSS THE SOUNDS WE MADE TODAY; HOW ARE UGLY SOUNDS CREATED? HOW MUCH AIR IS NEEDED TO PLAY THE INSTRUMENT? ROLE OF POSTURE AND BREATHING, ETC.
6. Do not forget to turn in signed rule sheets: worth 1 point

BEGINNING VIOLIN PERIOD 5:
OBJECTIVE: Violin Left Hold, Angle, and Pizzicato
1. TUNE
2. Left hand: finger springs; how fingers push down strings to start sounds.
a. Starting with left hand thumb placed under the curve of the neck (called 5th position) in a backwards "C" position, students depress the pad of the index finger (called 1st finger) down onto the "G" string in a "spring-like" motion four times (4x) silently then repeat the same on the"D" string 4x, "A" then "E" strings.
b. Repeat the same exercise again using the pad of the middle finger (called the 2nd finger), 3rd finger or "ring finger" and then finally using the 4th finger or "pinky" finger (the hardest finger to use or as I call it, "the dreaded 4th finger").
c. When using the 4th finger, if it can not reach the "G" string comfortably do not stretch it. Instead make more room for it by bring the left arm under the violin more. If when doing that the left arm feels stiff or in pain, try adjusting the violin angle slightly to the left.
d. Try to perform these "spring-like" finger actions by feel; without looking at the hand.
3. Add onto the previous step by performing a "plucking" or pulling the string-type motion called "pizzicato" or "pizz" for short. Pizzicato is the Italian musical term that means to pluck the string instead of using the bow.
a. To pizzicato: push down the left index finger pad onto the string and start the beginning of the "spring" motion (as we did before) then add a motion where you pull that finger away from the string to let it vibrate. Before performing the next pizzicato place the finger pad on the string (which stops the previous action's vibration) then restart: PLACE, PUSH DOWN, PULL
4. Left hand pizzicato is practiced 4x on each string starting on the "G" string using the first finger then using the 2nd, 3rd, and lastly the 4th finger. Adjustment of the violin angle may have to occur when plucking the "G" string with the 4th finger.
5. Left pizzicato and open string note reading to song "Cripple Creek."
a. Looking at open string notes (music notation) on the music chart posted (notes are color coated by string (BLUE"G," RED or PINK "D," YELLOW "A" and GREEN will be "E") students are to look at how high or low the notes are [as to their location on the staff (lines and spaces that notes sit on)] placed and comparing that to their violin string sounds determine the names: EX: Lowest color is "BLUE" and lowest violin string is "G."
b. Quarter note concept and notation are introduced (quarter notes are worth one beat of the heart). There are two types of beats: ones you hear and feel and ones that you only feel. The ones you only feel are called "rests" and they are notes that are not played, or silent notes.
c. Students are instructed to read the quarter notes saying the sound of "tah" and patsch (pat the knee with the hand) for quarter beats that are felt and heard and saying "rest" while creating a silent beat by waving the arm out and in for the beats that are only felt.
d. Repeat the above activity except change the "tahs" to the appropriate note name of the open string it represents.
e.. This activity is then transferred to the violin where the students are instructed to read the note letter names and rests out loud (as they occur ) while plucking the appropriate string using left hand pizzicato. All this is done to the recording.
f. A music "road map" direction (or what I like to call "music punctuation") for repeats (repeat sign) is introduced (a double bar with 2 dots) and the term "staff" (five lines and 4 spaces) is explained.

ADVANCED VIOLIN PERIOD 4:
OBJECTIVE: Preparation for Harvest Day performance on October 28th/Hoedown music
1. TUNE

2. Introduction to "Orange Blossom Special" song: teacher demonstration with posted chart
3. Hoedown: last section "CODA" is reviewed and quiz given on the violin parts. (Every student to play the passage: worth 4 points)
4. Hoedown CELLO: Fingering (and string names) are reviewed then section "A" of "Hoedown" is practiced with help of the piano.
5. Violin part "A" of Hoedown is reviewed from yesterday and then cello and violin parts are combined at section "A."
6. Students play Hoedown INTRO section and connect with section "A" (played 2x)
7. Section "B" (played 2x) of Hoedown is rehearsed and then added to the other sections already played.
8. First 3 sections are then played again to this format: INTRO/ "A" 2x/"B" 2x/ "A" 2x
9. ALL 4 sections are now put together by adding the CODA section at the end. This is practiced slowly before increasing the speed.
10. Start the beginning (train sound) of "Orange Blossom Special" using fingered (perfect 5th) double stops (which slide back and forth 1/2 step) and left hand pizzicato open "E" string

Tuesday, September 14, 2010

TUESDAY; SEPTEMBER 14, 2010

GENERAL MUSIC PERIODS 2, 3, 6:
COMPOSER: Chopin Military Polonaise for Orchestra

1. Discussed meaning of words "Polonaise" and "nationalism" in relation to Chopin's music.
OBJECTIVE: Intro to Recorder: Labeling and Care
1. Quote by Frederick Delius a famous composer
.....a. "SONG OF SUMMER" STORY OF DELIUS' LIFE PRODUCED AND DIRECTED BY KEN RUSSELL:


2. Solfege Roll: Review solfege hand signals adding "Sol." Teacher asks with hand signals: Sol-Mi-La-Sol-Mi ("Mar-y did you finish your quote?")/Student answers with hand signals: Sol-Mi-La-Sol-Mi ("Yes I did") and show the quote to me.
3. Pass out percussion name review worksheet: Pictures of instruments need to be labelled with their correct names. Classwork is to be done while recorders are going to be passed out. To be finished and passed in tomorrow: worth 2 points.
4. Teacher to pass out woodwind instruments called the recorders. Directions given on how to clean and store them in a sanitary way; where to label them and student responsibilities (like text books) as they are being loaned out for the semester. (Instruction will start tomorrow; students to take them home and experiment with them tonight.)
5. Do not forget to turn in signed rule sheets: worth 1 point


BEGINNING VIOLIN PERIOD 5:
OBJECTIVE: Set-Up: Violin Left Hold and Angle
1. TUNE (Show students a "tuning fork" and explain how and why it is used, how the tuning pitch of "A" has 440 vibrations per second, and then pass some around for students to try for themselves.

DETERMINING THE PROPER VIOLIN PLACEMENT ANGLE AND EXERCISES TO REINFORCE IT:
2. The violin angle as it is held at the neck is determined for each student based on the comfort of the left arm muscle as it is placed under the violin. (Everyone will play their violin at a slightly different angle.)
.....a. Pain and stiffness in the left arm muscle means that the angle the violin is being played at is incorrect for that person; a little aching of the arm muscle means the violin placement is okay as the arm muscle is being built up and getting stronger. Each student must learn to distinguish the difference between pain and aching. Pain always means that the student is using a muscle incorrectly.

3. Left hand: finger springs; how fingers push down strings to start sounds.
.....a. Starting with left hand thumb placed under the curve of the neck (called 5th position) in a backwards "C" position, students depress the pad of the index finger (called 1st finger) down onto the "G" string in a "spring-like" motion four times (4x) silently then repeat the same on the"D" string 4x, "A" then "E" strings.
.....b. Repeat the same exercise again using the pad of the middle finger (called the 2nd finger), 3rd finger or "ring finger" and then finally using the 4th finger or "pinky" finger (the hardest finger to use or as I call it, "the dreaded 4th finger").

ADVANCED VIOLIN PERIOD 4:
OBJECTIVE: Preparation for Harvest Day performance on October 28th/Hoedown music
1. TUNE

2. Cello: Looking at "Hoedown" cello part, start to read notes in bass clef. (Review bass clef line/space rules and compare to treble clef note naming line/space rules. Also review note reading by musical alphabet steps/skips.
a. Cello fingering (and string names) are reviewed then section "B" of "Hoedown" is practiced with help of the piano.
3. Violin part "B" of Hoedown is reviewed from yesterday and then cello and violin parts are combined at section "B."5.
4. Last section (coda) of "Hoedown" reviewed by violins.
5. Violins start section "A" of "Hoedown" (rhythm pattern: 8th note followed by 2 16th notes "Straw-ber-ry" or bow patterns of slow-fast-fast again using small amounts of the bow in the middle part).
6. Violins to start putting all 4 sections of "Hoe Down" together (to continue tomorrow).

REMINDER,
TOMORROW (WEDNESDAY):
PLAYING QUIZ ON THE "HOEDOWN" CODA SECTION.