Showing posts with label violin beginning. Show all posts
Showing posts with label violin beginning. Show all posts
Tuesday, May 6, 2014


Friday, October 18, 2013
FRIDAY, OCTOBER 18, 2013
QUOTE:
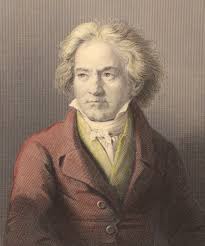
“What you are, you are by accident of birth; what I am, I am by myself. There are and will be a


.jpg)
“What you are, you are by accident of birth; what I am, I am by myself. There are and will be a
thousand princes; there is only one Beethoven.”
AUTHOR: Ludwig van Beethoven
MEANING OF THE QUOTE:
“Beethoven thinks he is unique, better than others. Through
“Beethoven thinks he is unique, better than others. Through
arrogant, his ego helped him produce beautiful music."
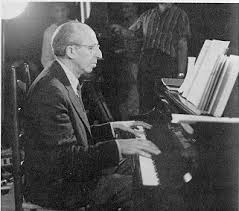
COMPOSER
COPLAND
Norman Rockwell
 |
| Norman Rockwell |
Lincoln Portrait
Narrated by Gregory Peck
Slide Show Produced by James Ayala
https://www.youtube.com/watch?v=cpocnsH3D7k
http://www.youtube.com/watch?v=ahWeXfTsjuA&feature=related

Lincoln Portrait
Narrated by Henry Fonda

GRANADA ADV. STRINGS
1. E MAJOR SCALE
a. Shifting on one string ascending
b. FINGERING:1 2 , 12, 1 2, 12
c. Use of GUIDE NOTES
2. TUMBALALAIKA
Narrated by Gregory Peck
Slide Show Produced by James Ayala
http://www.youtube.com/watch?v=ahWeXfTsjuA&feature=related
 |
| LeRoy Neiman |
Narrated by Henry Fonda


Aaron Copland and Lincoln Portrait
© Education Through Music, Inc. May be reproduced for educational purposes.
CURRICULUM CONNECTIONS
Social Studies: Abraham Lincoln, Civil War
AIM
Students will explore how music can create mood by listening, discussing and writing.
MATERIALS
Recording with excerpts
Information worksheet
Lyric sheet
ASSESSMENT
Read, correct and review homework assignments.
PROCEDURE
1.
Review music vocabulary:
piano, forte, crescendo, decrescendo, dolce.
2.
Ask the question to the class:
“Can music express emotion or feeling?
How?
Give examples.”
Write responses on the board.
3.
Introduce American composer Aaron Copland.
Write his name, dates, and Lincoln Portrait on the board.
Hand out information worksheet and read aloud or silently.
4.
Listen to two short excerpts:
the beginning of Appalachian Spring or the Clarinet Concerto
and the beginning of Fanfare for the Common Man.
Play the first 30 seconds of each.
After listening to each ask students to use two words to describe how the music “felt.”
Write responses on the board.
5.
Copland wrote another piece called Lincoln Portrait.
What is a portrait?
Can music be a portrait?
How?
6.
Create asemantic web for Abraham Lincoln.
Ask children to provide information about Lincoln
(16th president, very tall, had a beard, freed the slaves,
Civil War, assassinated, penny and five dollar bill, etc.).
7.
Ask students to listen to the beginning of the work and to
raise their hand when they hear something unusual (narrator).
Play the beginning of Lincoln Portrait.
8.
What do you call someone who tells a story?
In the Lincoln Portrait, Copland has chosen to have a narrator speak during the music.
Who do you think he is going to speak about?
Whose words will he use?
9.
Pass out the lyrics sheet.
Listen to the excerpt and point out changes in mood.
Pause occasionally to make a point or ask about the mood of the music.
10.
Review assignment for homework.
Young People’s Concert
NHSO

 |
| Carving of Abraham Lincoln at Mount Rushmore, ca. 1934 |
1. E MAJOR SCALE
a. Shifting on one string ascending
b. FINGERING:1 2 , 12, 1 2, 12
c. Use of GUIDE NOTES
2. TUMBALALAIKA
INTRO. TO INSTRUMENT
1. KEYBOARD
a. PENTATONIC BLACK KEY SONGS
b. EAR TRAINING
1. KEYBOARD
a. PENTATONIC BLACK KEY SONGS
b. EAR TRAINING
GRANADA BEG. STRINGS
1. OPEN STRING BOWING
a. 7 Bow Levels UH bow
b. Rhythm: My Sis-ter Mar-cy for slow and fast bows
2. JINGLE BELLS
a. Harmony
1) Explanation of harmony and melody
2) JINGLE BELLS OPEN STRING PART: MUSIC NOTATION
3) JINGLE BELLS OPEN STRING and 1ST FINGER PART: MUSIC NOTATION (fingering perfect 5ths)
4) Reviewed counting: quarters and 8ths
5) Reviewed note reading
a. Harmony and Melody
1) Class divided in half with one side playing melody and the other playing open string
harmony then they reverse
2) Class divided in half with one side playing melody and the other playing open string and first finger harmony then they reverse
2) Class divided into 3 parts (melody, and 2 harmony parts)
and played together
1. OPEN STRING BOWING
a. 7 Bow Levels UH bow
b. Rhythm: My Sis-ter Mar-cy for slow and fast bows
2. JINGLE BELLS
a. Harmony
1) Explanation of harmony and melody
2) JINGLE BELLS OPEN STRING PART: MUSIC NOTATION
3) JINGLE BELLS OPEN STRING and 1ST FINGER PART: MUSIC NOTATION (fingering perfect 5ths)
4) Reviewed counting: quarters and 8ths
5) Reviewed note reading
a. Harmony and Melody
1) Class divided in half with one side playing melody and the other playing open string
harmony then they reverse
2) Class divided in half with one side playing melody and the other playing open string and first finger harmony then they reverse
2) Class divided into 3 parts (melody, and 2 harmony parts)
and played together
HILLVIEW ORCHESTRA
1. SCALE: G CONCERT
a. Explanation of "tremelo"
b. Strings played tremelo on each note of scale
c. Winds played single notes
d. Drums performed rolls
2. TUMBALALAIKA


1. SCALE: G CONCERT
a. Explanation of "tremelo"
b. Strings played tremelo on each note of scale
c. Winds played single notes
d. Drums performed rolls
2. TUMBALALAIKA
 |
| George P.A. Healy |
 |
| Mathew B. Brady |
 |
| John Wesley Jarvis, 1861 |


Thursday, September 16, 2010
THURSDAY; SEPTEMBER 16, 2010
GENERAL MUSIC PERIODS 2, 3, 6:
COMPOSER: Chopin Waltz in Eb Opus 18-1 "Grande Valse"
OBJECTIVE: Intro to Recorder: Beautiful and Ugly Sounds/Articulation/Putting Fingers Down
(Periods 2,3,6):
1. Quote by Irving Berlin/famous popular and Broadway musical composer of the early 20th century.
2. Solfege Roll: Review solfege hand signals adding "Sol." Teacher asks with hand signals: Sol-Mi-La-Sol-Mi ("Mar-y did you finish your quote?")/Student answers with hand signals: Sol-Mi-La-Sol-Mi ("Yes I did") and show the quote to me.
3. HOW UGLY SOUNDS ARE CREATED and VARIOUS REASONS FOR SQUEAKY SOUNDS:
The reason I instruct my students to not put any fingers down yet is because I want them to concentrate first on the production of tone. To fix an ugly sound, first you must determine what caused it. If no fingers are being used in the production of the sound then it is very likely that the cause is associated in some way with the breathing (air control) apparatus.
4. HOW MUCH AIR IS NEEDED TO PLAY THE INSTRUMENT:
Unlike their modern relatives, the woodwind family, the recorders use small amounts of air in their production of pitched tones. These instruments are not capable of producing a good sound when too much air is blown into them. Too much air results in high, squeaky noises instead of distinct pitches. A good rule to think about, when playing the recorder, is never "blow" on it but instead "whisper" into it.
5. ROLE OF POSTURE AND BREATHING:
The speed of the air entering the recorder needs to be controlled and regulated because changes in air speed cause the intonation of the pitches to be altered. Steady streams of air (air speed) need to be going through the instrument in order to keep the sound from becoming wave-like or bumpy sounding. So, good breath control is essential for good intonation and beautiful tone quality. Breath control is directly related to proper posture. Mechanisms in the body responsible for breathing (lungs, diaphram muscle, etc.) can not work at their optimum best when a person has poor posture. Consequently, poor posture not only affects recorder playing, it most importantly, affects the health of the body. I like to connect the idea of air going through the body to water going through a garden hose: If a garden hose is bent or has a kink in it, does the water run smoothly through it? Poor posture does not allow the air to flow as freely through the body forcing the body to work harder then it should to circulate the air. If you overwork the body parts for long periods of time they may not last as long.
5. WHEN TO BREATHE:
When people talk they breathe at the end of phrases (like using a "comma"). Excessive breathing while talking makes the speech sound "choppy" and uncontrolled not to mention physically uncomfortable for the person who is speaking and irritating for the person who is listening to it. Musicians breathe in phrases just like people breathe in speech. To breathe in phrases, the air taken into the body must be portioned out (not let out all at once) so that there is enough air to produce a beautiful sound on each note. In order to do that the places the player breathes in the music must be planned ahead of time. Using a car and gasoline as an example: If you plan a trip through the desert and you don't want to run out of gas, you plan where you will be filling up your gas tank. If you plan incorrectly you will run out of gas. Just as a car will "sputter" as it is running out of gas, so will the sound of the instrument as the player runs out of air because the air stream becomes uncontrolled and thus "choppy" sounding. 7. IMPORTANCE OF ARTICULATION:
Articulation is how sounds are stopped and started. We articulate when we speak as we use our tongue to start certain sounds (consonances) behind our teeth to form words. Musical instruments are in a way imitations of the human voice; they also use articulation in production of their sounds. An example of a good articulated sound is when a triangle is struck. If the instrument is struck incorrectly, the result will be a vibration of sound that is weak (not pleasing to hear) but if it is struck correctly, the vibration will ring for a long period of time and create a beautiful tone. In recorder playing, separate individual sounds are started with the tongue softly (too hard produces sounds anywhere from harsh to squeaky) touching behind (not on) the upper teeth using a "dah" or "tah" tongue position. When playing in groups, instrumental performers playing the same parts need to articulate (and also breathe) the same way at the same time so the group can be heard by the audience as a single instrument.
7. A LITTLE SCIENCE ABOUT THE RECORDER:
A recorder is a tube that sound waves go through. The longer the tube the lower it will sound. When holes are covered on the recorder, the size of the tube changes altering the pitch. In reality each different fingering combination is a different size tube so the instrument is actually many sized tubes all in one. If those different size tubes were separated and placed side by side they would like the different sized pipes in a pipe organ (only smaller of course).
BEGINNING VIOLIN PERIOD 5:
OBJECTIVE: LEFT PIZZICATO and SET-UP OF VIOLIN LEFT POSITION/NOTE READING QUARTERS and OPEN STRINGS
THIS LESSON IS CONTINUED FROM YESTERDAY:
1. TUNE
2. Left hand: finger springs; how fingers push down strings to start sounds.
a. Starting with left hand thumb placed under the curve of the neck (called 5th position) in a backwards "C" position, students depress the pad of the index finger (called 1st finger) down onto the "G" string in a "spring-like" motion four times (4x) silently then repeat the same on the"D" string 4x, "A" then "E" strings.
b. Repeat the same exercise again using the pad of the middle finger (called the 2nd finger), 3rd finger or "ring finger" and then finally using the 4th finger or "pinky" finger (the hardest finger to use or as I call it, "the dreaded 4th finger").
c. When using the 4th finger, if it can not reach the "G" string comfortably do not stretch it. Instead make more room for it by bring the left arm under the violin more. If when doing that the left arm feels stiff or in pain, try adjusting the violin angle slightly to the left.
d. Try to perform these "spring-like" finger actions by feel; without looking at the hand.
3. Add onto the previous step by performing a "plucking" or pulling the string-type motion called "pizzicato" or "pizz" for short. Pizzicato is the Italian musical term tht means to pluck the string instead of using the bow.
a. To pizzicato: push down the left index finger pad onto the string and start the beginning of the "spring" motion (as we did before) then add a motion where you pull that finger away from the string to let it vibrate. Before performing the next pizzicato place the finger pad on the string (which stops the previous action's vibration) then restart: PLACE, PUSH DOWN, PULL
4. CYCLE OF STRINGS: Left hand pizzicato is practiced 4x on each string starting on the "G" string using the first finger then using the 2nd, 3rd, and lastly the 4th finger. Adjustment of the violin angle may have to occur when plucking the "G" string with the 4th finger.
5. Left pizzicato and open string note reading to song "Cripple Creek."
a. Looking at open string notes (music notation) on the music chart posted (notes are color coated by string (BLUE"G," RED or PINK "D," YELLOW "A" and GREEN will be "E") students are to look at how high or low the notes are [as to their location on the staff (lines and spaces that notes sit on)] placed and comparing that to their violin string sounds determine the names: EX: Lowest color is "BLUE" and lowest violin string is "G."
b. Quarter note concept and notation are introduced (quarter notes are worth one beat of the heart). There are two types of beats: ones you hear and feel and ones that you only feel. The ones you only feel are called "rests" and they are notes that are not played, or silent notes.
c. Students are instructed to read the quarter notes saying the sound of "tah" and patsch (pat the knee with the hand) for quarter beats that are felt and heard and saying "rest" while creating a silent beat by waving the arm out and in for the beats that are only felt.
d. Repeat the above activity except change the tahs to the appropriate note name of the open string it represents.
e.. This activity is then transfered to the violin where the students are instructed to read (sing) the note letter names and rests out loud (as they occur ) while plucking the appropriate string using left hand pizzicato. All this is done to the recording.(The violin is said to be the "imitation of the human voice" so singing (hearing) the music in your head is essential before playing it on the violin.)
f. A music "road map" direction (or what I like to call "music punctuation") for repeats (repeat sign) is introduced (a double bar with 2 dots) and the term "staff" (five lines and 4 spaces) is explained.
g. Tomorrow: open strings reviewed with song "Batman."
ADVANCED VIOLIN PERIOD 4:
OBJECTIVE: Preparation for Harvest Day performance on October 28th/Hoedown music
1. TUNE
2. "Hoedown": Class plays entirely to format: INTRO/ "A" 2x / "B" 2x / "A" 2x / CODA
3. "Orange Blossom Special":
a. Review the beginning (train sound) of "Orange Blossom Special" using fingered (perfect 5th) double stops (which slide back and forth 1/2 step) and left hand pizzicato open "E" string. Make sure the bow executes the 1/2 step slide on the same bow as the previous note.
b. Start at the beginning of the piece; count out the first 2 measures [which are silent rests: 1234, 2234) and then practice the next 4 measures. Again review the concept of perfect 5ths.
c. Go over note names and fingerings of the passages to be played.
d. Before playing the next section, work out its rhythm by counting out loud. Giving silly words to standard patterns of sound (rhythm) helps to conceptualize the rhythm before playing it.e. Review fingerings/note names then play. e. Next section is a repeat of a previous section already taught in class. So, go back to the begining and try to put all of the previous sections learned together.
COMPOSER: Chopin Waltz in Eb Opus 18-1 "Grande Valse"
http://www.youtube.com/watch?v=tLQ-6_OIds4&feature=related
OBJECTIVE: Intro to Recorder: Beautiful and Ugly Sounds/Articulation/Putting Fingers Down
(Periods 2,3,6):
1. Quote by Irving Berlin/famous popular and Broadway musical composer of the early 20th century.
2. Solfege Roll: Review solfege hand signals adding "Sol." Teacher asks with hand signals: Sol-Mi-La-Sol-Mi ("Mar-y did you finish your quote?")/Student answers with hand signals: Sol-Mi-La-Sol-Mi ("Yes I did") and show the quote to me.
3. HOW UGLY SOUNDS ARE CREATED and VARIOUS REASONS FOR SQUEAKY SOUNDS:
The reason I instruct my students to not put any fingers down yet is because I want them to concentrate first on the production of tone. To fix an ugly sound, first you must determine what caused it. If no fingers are being used in the production of the sound then it is very likely that the cause is associated in some way with the breathing (air control) apparatus.
4. HOW MUCH AIR IS NEEDED TO PLAY THE INSTRUMENT:
Unlike their modern relatives, the woodwind family, the recorders use small amounts of air in their production of pitched tones. These instruments are not capable of producing a good sound when too much air is blown into them. Too much air results in high, squeaky noises instead of distinct pitches. A good rule to think about, when playing the recorder, is never "blow" on it but instead "whisper" into it.
5. ROLE OF POSTURE AND BREATHING:
The speed of the air entering the recorder needs to be controlled and regulated because changes in air speed cause the intonation of the pitches to be altered. Steady streams of air (air speed) need to be going through the instrument in order to keep the sound from becoming wave-like or bumpy sounding. So, good breath control is essential for good intonation and beautiful tone quality. Breath control is directly related to proper posture. Mechanisms in the body responsible for breathing (lungs, diaphram muscle, etc.) can not work at their optimum best when a person has poor posture. Consequently, poor posture not only affects recorder playing, it most importantly, affects the health of the body. I like to connect the idea of air going through the body to water going through a garden hose: If a garden hose is bent or has a kink in it, does the water run smoothly through it? Poor posture does not allow the air to flow as freely through the body forcing the body to work harder then it should to circulate the air. If you overwork the body parts for long periods of time they may not last as long.
5. WHEN TO BREATHE:
When people talk they breathe at the end of phrases (like using a "comma"). Excessive breathing while talking makes the speech sound "choppy" and uncontrolled not to mention physically uncomfortable for the person who is speaking and irritating for the person who is listening to it. Musicians breathe in phrases just like people breathe in speech. To breathe in phrases, the air taken into the body must be portioned out (not let out all at once) so that there is enough air to produce a beautiful sound on each note. In order to do that the places the player breathes in the music must be planned ahead of time. Using a car and gasoline as an example: If you plan a trip through the desert and you don't want to run out of gas, you plan where you will be filling up your gas tank. If you plan incorrectly you will run out of gas. Just as a car will "sputter" as it is running out of gas, so will the sound of the instrument as the player runs out of air because the air stream becomes uncontrolled and thus "choppy" sounding. 7. IMPORTANCE OF ARTICULATION:
Articulation is how sounds are stopped and started. We articulate when we speak as we use our tongue to start certain sounds (consonances) behind our teeth to form words. Musical instruments are in a way imitations of the human voice; they also use articulation in production of their sounds. An example of a good articulated sound is when a triangle is struck. If the instrument is struck incorrectly, the result will be a vibration of sound that is weak (not pleasing to hear) but if it is struck correctly, the vibration will ring for a long period of time and create a beautiful tone. In recorder playing, separate individual sounds are started with the tongue softly (too hard produces sounds anywhere from harsh to squeaky) touching behind (not on) the upper teeth using a "dah" or "tah" tongue position. When playing in groups, instrumental performers playing the same parts need to articulate (and also breathe) the same way at the same time so the group can be heard by the audience as a single instrument.
7. A LITTLE SCIENCE ABOUT THE RECORDER:
A recorder is a tube that sound waves go through. The longer the tube the lower it will sound. When holes are covered on the recorder, the size of the tube changes altering the pitch. In reality each different fingering combination is a different size tube so the instrument is actually many sized tubes all in one. If those different size tubes were separated and placed side by side they would like the different sized pipes in a pipe organ (only smaller of course).
BEGINNING VIOLIN PERIOD 5:
OBJECTIVE: LEFT PIZZICATO and SET-UP OF VIOLIN LEFT POSITION/NOTE READING QUARTERS and OPEN STRINGS
THIS LESSON IS CONTINUED FROM YESTERDAY:
1. TUNE
2. Left hand: finger springs; how fingers push down strings to start sounds.
a. Starting with left hand thumb placed under the curve of the neck (called 5th position) in a backwards "C" position, students depress the pad of the index finger (called 1st finger) down onto the "G" string in a "spring-like" motion four times (4x) silently then repeat the same on the"D" string 4x, "A" then "E" strings.
b. Repeat the same exercise again using the pad of the middle finger (called the 2nd finger), 3rd finger or "ring finger" and then finally using the 4th finger or "pinky" finger (the hardest finger to use or as I call it, "the dreaded 4th finger").
c. When using the 4th finger, if it can not reach the "G" string comfortably do not stretch it. Instead make more room for it by bring the left arm under the violin more. If when doing that the left arm feels stiff or in pain, try adjusting the violin angle slightly to the left.
d. Try to perform these "spring-like" finger actions by feel; without looking at the hand.
3. Add onto the previous step by performing a "plucking" or pulling the string-type motion called "pizzicato" or "pizz" for short. Pizzicato is the Italian musical term tht means to pluck the string instead of using the bow.
a. To pizzicato: push down the left index finger pad onto the string and start the beginning of the "spring" motion (as we did before) then add a motion where you pull that finger away from the string to let it vibrate. Before performing the next pizzicato place the finger pad on the string (which stops the previous action's vibration) then restart: PLACE, PUSH DOWN, PULL
4. CYCLE OF STRINGS: Left hand pizzicato is practiced 4x on each string starting on the "G" string using the first finger then using the 2nd, 3rd, and lastly the 4th finger. Adjustment of the violin angle may have to occur when plucking the "G" string with the 4th finger.
5. Left pizzicato and open string note reading to song "Cripple Creek."
a. Looking at open string notes (music notation) on the music chart posted (notes are color coated by string (BLUE"G," RED or PINK "D," YELLOW "A" and GREEN will be "E") students are to look at how high or low the notes are [as to their location on the staff (lines and spaces that notes sit on)] placed and comparing that to their violin string sounds determine the names: EX: Lowest color is "BLUE" and lowest violin string is "G."
b. Quarter note concept and notation are introduced (quarter notes are worth one beat of the heart). There are two types of beats: ones you hear and feel and ones that you only feel. The ones you only feel are called "rests" and they are notes that are not played, or silent notes.
c. Students are instructed to read the quarter notes saying the sound of "tah" and patsch (pat the knee with the hand) for quarter beats that are felt and heard and saying "rest" while creating a silent beat by waving the arm out and in for the beats that are only felt.
d. Repeat the above activity except change the tahs to the appropriate note name of the open string it represents.
e.. This activity is then transfered to the violin where the students are instructed to read (sing) the note letter names and rests out loud (as they occur ) while plucking the appropriate string using left hand pizzicato. All this is done to the recording.(The violin is said to be the "imitation of the human voice" so singing (hearing) the music in your head is essential before playing it on the violin.)
f. A music "road map" direction (or what I like to call "music punctuation") for repeats (repeat sign) is introduced (a double bar with 2 dots) and the term "staff" (five lines and 4 spaces) is explained.
g. Tomorrow: open strings reviewed with song "Batman."
ADVANCED VIOLIN PERIOD 4:
OBJECTIVE: Preparation for Harvest Day performance on October 28th/Hoedown music
1. TUNE
2. "Hoedown": Class plays entirely to format: INTRO/ "A" 2x / "B" 2x / "A" 2x / CODA
3. "Orange Blossom Special":
a. Review the beginning (train sound) of "Orange Blossom Special" using fingered (perfect 5th) double stops (which slide back and forth 1/2 step) and left hand pizzicato open "E" string. Make sure the bow executes the 1/2 step slide on the same bow as the previous note.
b. Start at the beginning of the piece; count out the first 2 measures [which are silent rests: 1234, 2234) and then practice the next 4 measures. Again review the concept of perfect 5ths.
c. Go over note names and fingerings of the passages to be played.
d. Before playing the next section, work out its rhythm by counting out loud. Giving silly words to standard patterns of sound (rhythm) helps to conceptualize the rhythm before playing it.e. Review fingerings/note names then play. e. Next section is a repeat of a previous section already taught in class. So, go back to the begining and try to put all of the previous sections learned together.
Wednesday, September 15, 2010
WEDNESDAY; SEPTEMBER 15, 2010
GENERAL MUSIC PERIODS 2, 3, 6:
COMPOSER: Chopin Waltz in Db Major Opus 64 #1 "Minute Waltz" [Not really meant to be played in a minute but it is a very short piece played on the fast side.
OBJECTIVE: Intro to Recorder: Making Sounds
(Periods 2,3,6):
1. Quote by J.S. Bach/explanation about how long ago he lived and how musicians of his time made a living (who could afford to pay his salary) and what types of audiences were listening to his music.
2. Solfege Roll: Review solfege hand signals adding "Sol." Teacher asks with hand signals: Sol-Mi-La-Sol-Mi ("Mar-y did you finish your quote?")/Student answers with hand signals: Sol-Mi-La-Sol-Mi ("Yes I did") and show the quote to me.
3. Finish percussion worksheets: Pictures of instruments need to be labelled with their correct names. A few students volunteer to go up to the white board and fill in the names of the instruments on the charts (same as the assignment) so everyone can check their answers. Worksheets to be turned in when finished: worth 2 points.
4. Recorders taken out and teacher gives directions with silent cues (as a conductor would). Students to echo sounds played by the teacher: loud vs soft, slow versus fast, ugly versus pretty sounds, steady versus bumpy type sounds.
5. Recorders left hand and right hand; why are the right hand fingers placed on the bottom of the instrument?
TOMORROW: DISCUSS THE SOUNDS WE MADE TODAY; HOW ARE UGLY SOUNDS CREATED? HOW MUCH AIR IS NEEDED TO PLAY THE INSTRUMENT? ROLE OF POSTURE AND BREATHING, ETC.
6. Do not forget to turn in signed rule sheets: worth 1 point
BEGINNING VIOLIN PERIOD 5:
OBJECTIVE: Violin Left Hold, Angle, and Pizzicato
1. TUNE
2. Left hand: finger springs; how fingers push down strings to start sounds.
a. Starting with left hand thumb placed under the curve of the neck (called 5th position) in a backwards "C" position, students depress the pad of the index finger (called 1st finger) down onto the "G" string in a "spring-like" motion four times (4x) silently then repeat the same on the"D" string 4x, "A" then "E" strings.
b. Repeat the same exercise again using the pad of the middle finger (called the 2nd finger), 3rd finger or "ring finger" and then finally using the 4th finger or "pinky" finger (the hardest finger to use or as I call it, "the dreaded 4th finger").
c. When using the 4th finger, if it can not reach the "G" string comfortably do not stretch it. Instead make more room for it by bring the left arm under the violin more. If when doing that the left arm feels stiff or in pain, try adjusting the violin angle slightly to the left.
d. Try to perform these "spring-like" finger actions by feel; without looking at the hand.
3. Add onto the previous step by performing a "plucking" or pulling the string-type motion called "pizzicato" or "pizz" for short. Pizzicato is the Italian musical term that means to pluck the string instead of using the bow.
a. To pizzicato: push down the left index finger pad onto the string and start the beginning of the "spring" motion (as we did before) then add a motion where you pull that finger away from the string to let it vibrate. Before performing the next pizzicato place the finger pad on the string (which stops the previous action's vibration) then restart: PLACE, PUSH DOWN, PULL
4. Left hand pizzicato is practiced 4x on each string starting on the "G" string using the first finger then using the 2nd, 3rd, and lastly the 4th finger. Adjustment of the violin angle may have to occur when plucking the "G" string with the 4th finger.
5. Left pizzicato and open string note reading to song "Cripple Creek."
a. Looking at open string notes (music notation) on the music chart posted (notes are color coated by string (BLUE"G," RED or PINK "D," YELLOW "A" and GREEN will be "E") students are to look at how high or low the notes are [as to their location on the staff (lines and spaces that notes sit on)] placed and comparing that to their violin string sounds determine the names: EX: Lowest color is "BLUE" and lowest violin string is "G."
b. Quarter note concept and notation are introduced (quarter notes are worth one beat of the heart). There are two types of beats: ones you hear and feel and ones that you only feel. The ones you only feel are called "rests" and they are notes that are not played, or silent notes.
c. Students are instructed to read the quarter notes saying the sound of "tah" and patsch (pat the knee with the hand) for quarter beats that are felt and heard and saying "rest" while creating a silent beat by waving the arm out and in for the beats that are only felt.
d. Repeat the above activity except change the "tahs" to the appropriate note name of the open string it represents.
e.. This activity is then transferred to the violin where the students are instructed to read the note letter names and rests out loud (as they occur ) while plucking the appropriate string using left hand pizzicato. All this is done to the recording.
f. A music "road map" direction (or what I like to call "music punctuation") for repeats (repeat sign) is introduced (a double bar with 2 dots) and the term "staff" (five lines and 4 spaces) is explained.
ADVANCED VIOLIN PERIOD 4:
OBJECTIVE: Preparation for Harvest Day performance on October 28th/Hoedown music
1. TUNE
2. Introduction to "Orange Blossom Special" song: teacher demonstration with posted chart
3. Hoedown: last section "CODA" is reviewed and quiz given on the violin parts. (Every student to play the passage: worth 4 points)
4. Hoedown CELLO: Fingering (and string names) are reviewed then section "A" of "Hoedown" is practiced with help of the piano.
5. Violin part "A" of Hoedown is reviewed from yesterday and then cello and violin parts are combined at section "A."
6. Students play Hoedown INTRO section and connect with section "A" (played 2x)
7. Section "B" (played 2x) of Hoedown is rehearsed and then added to the other sections already played.
8. First 3 sections are then played again to this format: INTRO/ "A" 2x/"B" 2x/ "A" 2x
9. ALL 4 sections are now put together by adding the CODA section at the end. This is practiced slowly before increasing the speed.
10. Start the beginning (train sound) of "Orange Blossom Special" using fingered (perfect 5th) double stops (which slide back and forth 1/2 step) and left hand pizzicato open "E" string
COMPOSER: Chopin Waltz in Db Major Opus 64 #1 "Minute Waltz" [Not really meant to be played in a minute but it is a very short piece played on the fast side.
Played by: Ignaz Friedman
OBJECTIVE: Intro to Recorder: Making Sounds
(Periods 2,3,6):
1. Quote by J.S. Bach/explanation about how long ago he lived and how musicians of his time made a living (who could afford to pay his salary) and what types of audiences were listening to his music.
2. Solfege Roll: Review solfege hand signals adding "Sol." Teacher asks with hand signals: Sol-Mi-La-Sol-Mi ("Mar-y did you finish your quote?")/Student answers with hand signals: Sol-Mi-La-Sol-Mi ("Yes I did") and show the quote to me.
3. Finish percussion worksheets: Pictures of instruments need to be labelled with their correct names. A few students volunteer to go up to the white board and fill in the names of the instruments on the charts (same as the assignment) so everyone can check their answers. Worksheets to be turned in when finished: worth 2 points.
4. Recorders taken out and teacher gives directions with silent cues (as a conductor would). Students to echo sounds played by the teacher: loud vs soft, slow versus fast, ugly versus pretty sounds, steady versus bumpy type sounds.
5. Recorders left hand and right hand; why are the right hand fingers placed on the bottom of the instrument?
TOMORROW: DISCUSS THE SOUNDS WE MADE TODAY; HOW ARE UGLY SOUNDS CREATED? HOW MUCH AIR IS NEEDED TO PLAY THE INSTRUMENT? ROLE OF POSTURE AND BREATHING, ETC.
6. Do not forget to turn in signed rule sheets: worth 1 point
BEGINNING VIOLIN PERIOD 5:
OBJECTIVE: Violin Left Hold, Angle, and Pizzicato
1. TUNE
2. Left hand: finger springs; how fingers push down strings to start sounds.
a. Starting with left hand thumb placed under the curve of the neck (called 5th position) in a backwards "C" position, students depress the pad of the index finger (called 1st finger) down onto the "G" string in a "spring-like" motion four times (4x) silently then repeat the same on the"D" string 4x, "A" then "E" strings.
b. Repeat the same exercise again using the pad of the middle finger (called the 2nd finger), 3rd finger or "ring finger" and then finally using the 4th finger or "pinky" finger (the hardest finger to use or as I call it, "the dreaded 4th finger").
c. When using the 4th finger, if it can not reach the "G" string comfortably do not stretch it. Instead make more room for it by bring the left arm under the violin more. If when doing that the left arm feels stiff or in pain, try adjusting the violin angle slightly to the left.
d. Try to perform these "spring-like" finger actions by feel; without looking at the hand.
3. Add onto the previous step by performing a "plucking" or pulling the string-type motion called "pizzicato" or "pizz" for short. Pizzicato is the Italian musical term that means to pluck the string instead of using the bow.
a. To pizzicato: push down the left index finger pad onto the string and start the beginning of the "spring" motion (as we did before) then add a motion where you pull that finger away from the string to let it vibrate. Before performing the next pizzicato place the finger pad on the string (which stops the previous action's vibration) then restart: PLACE, PUSH DOWN, PULL
4. Left hand pizzicato is practiced 4x on each string starting on the "G" string using the first finger then using the 2nd, 3rd, and lastly the 4th finger. Adjustment of the violin angle may have to occur when plucking the "G" string with the 4th finger.
5. Left pizzicato and open string note reading to song "Cripple Creek."
a. Looking at open string notes (music notation) on the music chart posted (notes are color coated by string (BLUE"G," RED or PINK "D," YELLOW "A" and GREEN will be "E") students are to look at how high or low the notes are [as to their location on the staff (lines and spaces that notes sit on)] placed and comparing that to their violin string sounds determine the names: EX: Lowest color is "BLUE" and lowest violin string is "G."
b. Quarter note concept and notation are introduced (quarter notes are worth one beat of the heart). There are two types of beats: ones you hear and feel and ones that you only feel. The ones you only feel are called "rests" and they are notes that are not played, or silent notes.
c. Students are instructed to read the quarter notes saying the sound of "tah" and patsch (pat the knee with the hand) for quarter beats that are felt and heard and saying "rest" while creating a silent beat by waving the arm out and in for the beats that are only felt.
d. Repeat the above activity except change the "tahs" to the appropriate note name of the open string it represents.
e.. This activity is then transferred to the violin where the students are instructed to read the note letter names and rests out loud (as they occur ) while plucking the appropriate string using left hand pizzicato. All this is done to the recording.
f. A music "road map" direction (or what I like to call "music punctuation") for repeats (repeat sign) is introduced (a double bar with 2 dots) and the term "staff" (five lines and 4 spaces) is explained.
ADVANCED VIOLIN PERIOD 4:
OBJECTIVE: Preparation for Harvest Day performance on October 28th/Hoedown music
1. TUNE
2. Introduction to "Orange Blossom Special" song: teacher demonstration with posted chart
3. Hoedown: last section "CODA" is reviewed and quiz given on the violin parts. (Every student to play the passage: worth 4 points)
4. Hoedown CELLO: Fingering (and string names) are reviewed then section "A" of "Hoedown" is practiced with help of the piano.
5. Violin part "A" of Hoedown is reviewed from yesterday and then cello and violin parts are combined at section "A."
6. Students play Hoedown INTRO section and connect with section "A" (played 2x)
7. Section "B" (played 2x) of Hoedown is rehearsed and then added to the other sections already played.
8. First 3 sections are then played again to this format: INTRO/ "A" 2x/"B" 2x/ "A" 2x
9. ALL 4 sections are now put together by adding the CODA section at the end. This is practiced slowly before increasing the speed.
10. Start the beginning (train sound) of "Orange Blossom Special" using fingered (perfect 5th) double stops (which slide back and forth 1/2 step) and left hand pizzicato open "E" string
Subscribe to:
Posts (Atom)